
Table of Contents
ToggleBleak Falls Barrow stands as one of Skyrim’s most iconic dungeons, a rite of passage that nearly every Dragonborn encounters within their first few hours of gameplay. This ancient Nordic ruin looms over the landscape west of Riverwood, its crumbling towers visible from the main road leading to Whiterun. What makes this dungeon particularly significant isn’t just its placement in the main questline, it’s the perfect tutorial for everything Skyrim throws at you later: environmental puzzles, deadly Draugr encounters, trap-laden corridors, and your first proper boss fight.
Whether you’re running a fresh playthrough in 2026 or finally diving into Skyrim for the first time (welcome, by the way), Bleak Falls Barrow deserves your full attention. Miss the details here, and you’ll stumble through dozens of similar Nordic ruins without understanding the patterns. This guide breaks down every puzzle solution, enemy encounter, hidden treasure, and strategic approach you’ll need to conquer the barrow efficiently, regardless of your build or playstyle.
Key Takeaways
- Bleak Falls Barrow is Skyrim’s essential tutorial dungeon that teaches fundamental mechanics like Nordic pillar puzzles, Draugr combat patterns, and Word Wall mechanics that repeat throughout 150+ dungeons.
- The Golden Claw puzzle solution is Bear, Moth, Owl (outer to inner ring), and this claw-key pattern applies to multiple other Nordic ruins across Skyrim.
- Level 5 is the recommended starting point with fire-based damage being highly effective against Draugr, who have no fire resistance and can be defeated with proper preparation.
- The Draugr Overlord boss requires staggering tactics with power attacks, maintaining distance, and using pillars for cover to survive his high damage output and Unrelenting Force shout.
- Learning the first word of Unrelenting Force (Fus) from the Word Wall is separate from unlocking it—you need a dragon soul from your first dragon encounter to actually use the shout.
- Stealth archers gain a significant advantage in Bleak Falls Barrow by sneak-attacking dormant Draugr for massive multiplier damage before they wake from their alcoves.
Overview of Bleak Falls Barrow
Location and How to Find Bleak Falls Barrow
Bleak Falls Barrow sits northwest of Riverwood, perched on a mountainside that’s impossible to miss once you know where to look. Fast travel to Riverwood if you’ve already discovered it, then follow the main road west toward the Guardian Stones. You’ll spot a path branching north, take it, and you’ll see the ruins rising above the treeline.
The exterior approach features a small bandit camp at the base. These bandits respawn every 10 in-game days, so expect resistance even on repeat visits. Once you clear them, the main entrance sits at the top of the stone stairs. There’s also a secondary entrance through Bleak Falls Temple, but you’ll access that from inside during your main run.
Coordinates for console commands or map markers: the barrow is located at cell coordinates (9, 13) on the world map grid. PC players can use coc BleakFallsBarrow01 to jump directly inside, though that defeats half the experience.
Why This Dungeon Matters for Your Playthrough
Bleak Falls Barrow isn’t optional if you’re following the main quest. The Golden Claw quest from Lucan Valerius in Riverwood leads here, as does Farengar’s request for the Dragonstone once you reach Whiterun. Both are essential for progressing the main storyline toward your first dragon encounter at the Western Watchtower.
Beyond quest requirements, this dungeon teaches you fundamental dungeon-crawling mechanics that repeat throughout Skyrim’s 150+ dungeons. The Nordic pillar puzzle pattern, the Word Wall mechanic for learning shouts, and the Draugr combat rhythm all debut here. Learn these patterns now, and every subsequent ruin becomes second nature.
The loot quality scales with your level when you first enter, so there’s no “wrong” time to tackle it. That said, most players hit Bleak Falls between levels 2-6 during natural progression.
Preparing for the Journey
Recommended Level and Gear
Level 5 is the sweet spot for first-timers. You’ll have enough health to survive a few mistakes and enough stamina for power attacks or sprinting away from danger. Lower levels can manage with smart play, but expect to chug potions and save frequently.
Weapon choice matters more than raw damage at this stage:
- Melee builds: Any iron or steel weapon works. Grab a shield if you’re going sword-and-board.
- Archers: Stock 50+ arrows minimum. Iron arrows are fine.
- Mages: Fire spells excel against Draugr since they lack fire resistance. Flames or Firebolt will carry you through.
Armor-wise, wear whatever gives the best rating. Light armor users should grab the hide or leather sets from Riverwood. Heavy armor users can pick up imperial or steel pieces from the Riverwood trader or loot from bandits. Enchantments aren’t critical yet, but any +Health or +Stamina pieces help.
Essential Supplies and Potions
Don’t walk into Bleak Falls empty-handed. The barrow has limited healing opportunities, and you won’t find a merchant inside when things go sideways.
Must-have inventory:
- 10-15 health potions: Minor or lesser quality is sufficient. Craft them if you’ve been gathering blue mountain flowers and wheat.
- 5-8 stamina potions: For power attacks and sprinting. Less critical but useful for warriors.
- Lockpicks: Bring at least 5-10. There are adept-level locks inside that hold decent loot.
- Torches or Candlelight spell: The barrow has dark sections. Magelight works too if you’ve purchased it.
- Cure Disease potions or Shrine blessing: Draugr can inflict diseases. Visit the Shrine of Arkay in Riverwood beforehand if you’re not carrying cures.
Food stacks are underrated. Bread, cheese, and apples provide slow regeneration during breather moments. Grab whatever the Riverwood Trader has in stock.
Step-by-Step Walkthrough
Entering the Ruins and the Outer Sanctum
The entrance dumps you into a stone corridor lit by torches. Immediately ahead, a dead bandit lies near a lever. Pull the lever to open the gate, but watch for the pressure plate just beyond, it triggers a swinging blade trap. Time your movement or trigger it from range with an arrow.
Follow the corridor down. You’ll hear bandits arguing in the next chamber. Three bandits occupy this area: two in the main room and one on the upper walkway. Stealth builds can snipe from the entrance. Melee fighters should rush the lower two first, then handle the archer above. The upper level has an unlocked chest with minor loot, usually around 20-40 gold and a potion.
Continue through the wooden door. The next area features a trapped corridor with a hanging oil lantern above a puddle. Shoot the lantern if bandits are nearby for an easy kill. Otherwise, just walk around it.
You’ll encounter Arvel the Swift, a Dark Elf thief trapped in a spider web. He’s screaming about a giant frostbite spider, which immediately attacks when you enter. This spider is tankier than wildlife spiders and deals frost damage. Keep your distance if you’re low on health, and aim for headshots if you’re using a bow. Many players following guides on platforms like Twinfinite recommend kiting the spider around the central pillar.
Navigating the Catacombs and Dealing with Draugr
Once the spider’s dead, approach Arvel. He begs you to cut him down and promises to share the secrets of the Golden Claw. Cut him free, and he immediately bolts deeper into the ruins. Chase him or let the Draugr ahead do your work, he won’t survive long.
The catacombs are where you meet your first Draugr. These undead warriors are tougher than bandits, with higher armor ratings and the ability to shout you off balance (yes, Draugr have Thu’um too). They wake from alcoves and sarcophagi, often ambushing you mid-exploration.
Draugr combat tips:
- Power attacks stagger them, buying you time for follow-up hits.
- Fire damage is highly effective, they have no resistance.
- Headshots with bows deal bonus damage and can prevent them from closing distance.
- They telegraph their shouts with a brief animation. Dodge or block when you see it.
The first few Draugr are low-level (Restless Draugr), but tougher variants appear deeper in. Expect 4-6 Draugr encounters before reaching the puzzle chamber. One alcove on the left side of the main catacomb corridor contains a Potion of Minor Healing and some gold.
Watch for floor pressure plates, one near the bottom of the first ramp triggers a battering ram trap that swings from the ceiling. Trigger it from range or just sprint past.
Solving the Golden Claw Puzzle
After looting Arvel’s corpse (he never makes it far), you’ll find the Golden Claw in his inventory along with a journal. The journal explicitly tells you the claw’s combination, but here’s the solution for anyone who skipped reading it:
The combination, from outer ring to inner ring: Bear, Moth, Owl.
The puzzle door itself shows three rotating rings. Align each ring to match the symbols:
- Outer ring: Bear
- Middle ring: Moth
- Inner ring: Owl
Insert the Golden Claw into the keyhole in the center. The door mechanism grinds open, revealing the Nordic Hall beyond. This puzzle pattern repeats in several other dungeons, always check the claw item in your inventory under the Misc tab. Rotate it in the inspection view to see the combination etched on the palm.
The Nordic Pillar Puzzle Solution
Just past the Golden Claw door, you’ll encounter a room with three rotating stone pillars and a gate mechanism. This is Skyrim’s signature environmental puzzle, and you’ll see variations of it in dozens of ruins.
The solution:
Look at the carvings above the gate and on the opposite wall behind you. The correct symbols are:
- Left pillar: Snake
- Middle pillar: Snake
- Right pillar: Whale
Rotate each pillar to match these symbols, then pull the chain on the right side of the gate. The gate opens, and you’re free to proceed. If you get it wrong, oil sprays from the walls and can be ignited by the fire trap triggered by the chain, painful but not fatal if you’re quick.
Some versions of the game have a bug where the pillars are pre-rotated correctly. If that’s the case, just pull the chain.
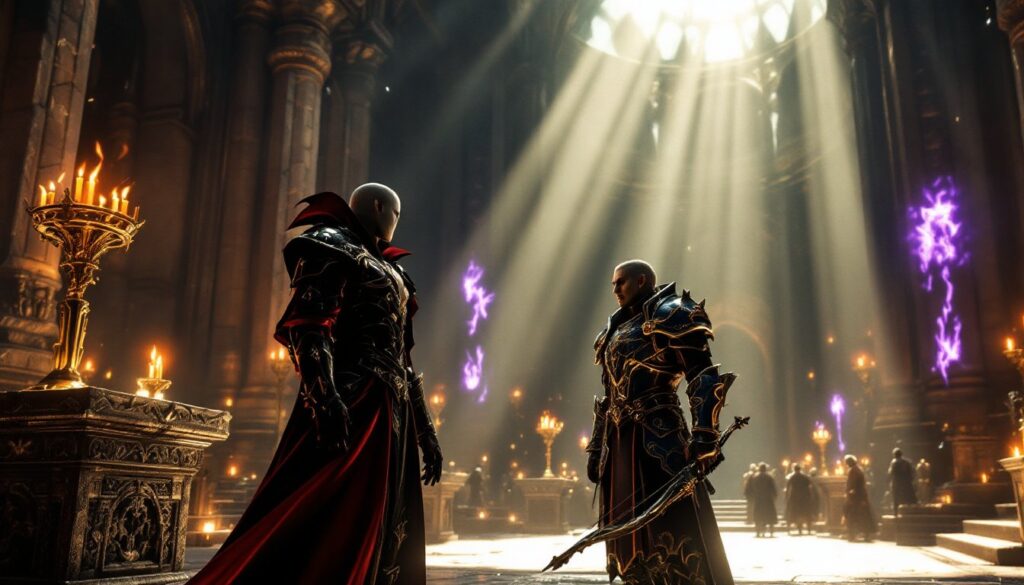
Confronting the Final Boss and Obtaining the Dragonstone
The final chamber is massive, featuring a Word Wall at the far end and a raised sarcophagus in the center. Approach the Word Wall first to learn your first word of Unrelenting Force (Fus). The moment you absorb the word, the sarcophagus lid slides open, and a Draugr Overlord emerges.
This boss is significantly tougher than regular Draugr:
- Higher health pool (around 200-250 HP depending on your level)
- Shouts Unrelenting Force at you, staggering and dealing damage
- Wields a two-handed weapon (usually a greatsword or battleaxe) with heavy damage output
- Can heal himself if you don’t maintain pressure
Resources like IGN emphasize keeping your distance and using the pillars for cover against his shouts.
Tactics by build:
- Melee: Circle-strafe and attack after he swings. Block or dodge his shouts. Use power attacks to stagger him.
- Archery: Kite around the room, using the central structure and pillars as cover. Aim for headshots between his shouts.
- Magic: Maintain distance and spam fire spells. He has no fire resistance. Dual-casting Flames melts him quickly.
Once he’s down, loot his corpse for the Dragonstone, a quest item for Farengar’s research, and an enchanted weapon (usually an axe or sword with a minor enchantment). The chest behind his sarcophagus contains leveled loot: gold, potions, and possibly a skill book.
A shortcut passage opens behind the Word Wall, leading to a waterfall exit. Jump into the water below and swim out, you’ll emerge outside Bleak Falls Temple, with a quick route back to Riverwood.
Important Loot and Collectibles
The Golden Claw: Finding and Using It
The Golden Claw is Arvel’s primary inventory item. He’s carrying it when you free him, and you’ll loot it from his corpse shortly after. This ornate artifact is both a quest item and a key, you need it to unlock the puzzle door deeper in the barrow.
After completing the dungeon, return the claw to Lucan Valerius in Riverwood for a 400 gold reward. But, many players choose to keep it as a decorative item for their home. If you’re building a display collection in Breezehome or Lakeview Manor, the Golden Claw makes an excellent centerpiece.
Pro tip: Inspect the claw in your inventory (rotate it under the Misc items) to see the combination. This teaches you that all claw keys work the same way, rotate and read the palm.
Dragonstone and Its Role in the Main Quest
The Dragonstone is your primary objective if you’re following Farengar’s quest from Whiterun. This ancient tablet contains a map of dragon burial sites across Skyrim, which Farengar uses to predict where dragons might return.
You’ll find the Dragonstone on the Draugr Overlord’s corpse at the end of Bleak Falls Barrow. It weighs 0 units, so there’s no inventory management issue. Return it to Farengar in Dragonsreach for a leveled gold reward (usually 400-500 gold) and progression toward the next main quest stage: encountering your first dragon at the Western Watchtower.
If you complete “The Golden Claw” quest before talking to Farengar, you can streamline both quests in a single dungeon run, a common speedrun tactic.
Hidden Treasure and Skill Books
Bleak Falls Barrow contains several easy-to-miss items:
- Skill Book: “Thief” (Pickpocket): Located on a table in one of the early catacomb chambers, near a knapsack and some gold. Reading it grants a free Pickpocket skill increase.
- Potion stash: Check the shelves in the embalming chamber (the room with the alchemy table). You’ll find minor potions and ingredients.
- Adept-locked chest: Hidden in an alcove past the first Draugr section. Contains leveled gold and a chance for jewelry.
- Enchanted weapon: The Overlord’s chest usually has a weapon with a minor enchantment (Fire Damage, Stamina Damage, etc.). Not top-tier, but useful for disenchanting if you’re building an enchanting skill base.
There’s also loose gold scattered on tables and in urns throughout. Individually small, but it adds up to 150-250 gold total if you loot everything.
Learning Your First Dragon Shout
How to Unlock the Word Wall
The Word Wall in Bleak Falls Barrow sits at the far end of the final chamber, behind the Overlord’s sarcophagus. Walk up to the wall, and you’ll see glowing runes carved into the stone. As you approach, one word begins to glow brighter, this is Fus, the first word of the Unrelenting Force shout.
The absorption happens automatically. You’ll see the word float off the wall and into your character, accompanied by a resonant hum. The game displays a notification: “You have learned a word of power: Force, Fus.” This is your first introduction to the Thu’um mechanic.
Important: Learning a word and unlocking it are separate steps. After absorbing Fus, you can’t use it yet. You need a dragon soul to unlock it (covered in the next section).
Understanding the Unrelenting Force Shout
Unrelenting Force (Fus Ro Dah) is Skyrim’s most iconic shout and your primary crowd-control tool for the entire game. At one word (Fus), it staggers enemies and deals minor damage. At two words, it knocks enemies down. At three words (the full Fus Ro Dah), it sends enemies flying, often killing them via fall damage or environmental hazards.
After killing your first dragon at the Western Watchtower (the next main quest step), you’ll automatically absorb its soul. Open the Magic menu, navigate to Shouts, and select Unrelenting Force. Press the unlock button on the Fus word using the dragon soul you absorbed.
Players testing builds on sites like Game8 frequently cite Unrelenting Force as the most versatile shout for crowd control across all playstyles.
Cooldown: 15 seconds for the one-word version. This scales up with additional words but remains manageable.
Practical uses:
- Knocking enemies off cliffs or ledges for instant kills
- Interrupting enemy power attacks or spellcasting
- Disarming opponents (they drop their weapon when staggered)
- Creating space when surrounded
You’ll find the second and third words in other locations: Ro at High Hrothgar (quest-related), and Dah at various dragon lairs.
Common Mistakes and How to Avoid Them
Killing Arvel before looting the Golden Claw: If you hit Arvel with an area-of-effect spell or arrow while he’s running, you might kill him in an awkward spot. His body can fall through the floor or into unreachable areas. Always let him run a bit before engaging, the Draugr usually kill him in a convenient spot.
Missing the skill book: The “Thief” skill book is sitting in plain sight on a table, but many players sprint through this area chasing Arvel. Slow down and check tables and shelves for books with unique models (thicker, angled differently than clutter books).
Using all your health potions on trash mobs: The Draugr Overlord is the real threat. If you’re burning through potions on regular Draugr, you’re either underleveled or not using your weapon’s reach/range effectively. Learn to kite and use power attacks to stagger instead of face-tanking damage.
Forgetting to unlock the shout: Learning a word and unlocking it are separate. After absorbing Fus from the Word Wall, you won’t be able to use it until you spend a dragon soul in the Magic menu. Many first-time players wonder why their shout button doesn’t work, this is why.
Ignoring the chain behind the Overlord’s sarcophagus: There’s a pull chain that opens a shortcut to the waterfall exit. If you miss it, you’ll have to backtrack through the entire dungeon. Look for the chain on the wall behind the Word Wall.
Not managing weight before looting the boss chest: If you’re near your carry limit, you might miss out on loot from the boss chest. Drop heavy clutter (iron armor, low-value weapons) before opening it. Those with additional challenges from Survival Mode face even stricter weight penalties.
Fighting in trap corridors: Several hallways have pressure plates that trigger spike walls, battering rams, or swinging blades. Don’t kite enemies into trap zones unless you’re deliberately using them against foes. More often, you’ll hurt yourself.
Tips for Different Playstyles
Stealth and Archery Approach
Stealth trivializes most of Bleak Falls Barrow. Draugr have poor perception when dormant, and the low light levels favor sneaking.
Key tactics:
- Sneak-attack the first Draugr in their alcoves before they wake. This often one-shots them at low levels.
- Use the Silent Roll perk (if you’re Sneak 20+) to reposition without breaking stealth.
- Kite enemies into trap corridors and trigger mechanisms from range. Let the dungeon do the work.
- Aim for headshots on the Overlord. With 3x sneak attack multiplier (or higher if you’ve perked into it), you can chunk 50% of his health before he reaches you.
Bring a dagger as a backup. If a Draugr closes distance, a 15x sneak attack multiplier (unique to daggers) with a power attack often kills them outright.
Poison arrows are overkill at this level but speed up the Overlord fight if you’ve crafted any.
Melee Combat Strategy
Melee builds need to manage stamina and health carefully. Draugr hit hard, and the Overlord’s two-handed swings can drop you in 2-3 hits at low levels.
Core strategy:
- Block or dodge after every enemy swing, then counter with a power attack. This rhythm staggers Draugr and prevents retaliation.
- Use a shield if you’re inexperienced. The armor rating and block chance significantly reduce incoming damage.
- Don’t fight multiple Draugr at once. Kite them into doorways or narrow corridors where only one can reach you at a time.
- Save power attacks for interrupts or when the enemy is staggered. Don’t spam them, you’ll drain stamina and leave yourself vulnerable.
Against the Overlord, circle-strafe constantly. His greatsword has a wide arc, so lateral movement dodges most swings. Attack twice, then block or dodge his shout. Repeat until dead.
Bring vegetable soup if you have it. The stamina regeneration lets you power attack more frequently without running dry.
Magic User Tactics
Fire mages dominate Bleak Falls. Draugr lack fire resistance, and flames spread damage across groups if they cluster.
Spell recommendations:
- Flames (Destruction 0): Your bread-and-butter spell. Dual-cast it for higher DPS. Hold the stream on enemies until they’re ash.
- Firebolt (Destruction 25): If you’ve leveled Destruction and purchased it from Farengar or the court wizards, this is a straight upgrade. Higher damage, longer range, faster kill times.
- Healing (Restoration 0): Keep this hotkeyed. Cast it in breather moments or while kiting.
- Oakflesh (Alteration 0): 40 extra armor rating for 60 seconds. Cast it before entering each new chamber.
Magicka management is tight at low levels. Bring 5-10 magicka potions or invest in enchanted jewelry (+Magicka or Fortify Destruction) from the Riverwood trader.
Overlord strategy: Maintain maximum distance. Dual-cast Flames or Firebolt while backpedaling. Use the pillars and central structure as line-of-sight blockers to avoid his shouts. If he closes distance, hit him with Unrelenting Force (if unlocked) to create space, then resume burning.
Staves are an option if you’ve found one. The Staff of Firebolts from the Embershard Mine (just south of Riverwood) is a solid backup weapon that doesn’t consume magicka.
Related Quests and Connections
Bleak Falls Barrow ties into several quest chains beyond the main story:
The Golden Claw (Misc): Given by Lucan Valerius in Riverwood. Completing this nets you 400 gold and opens additional dialogue with the Riverwood traders. It’s a simple fetch quest, but it introduces you to the dungeon organically.
Bleak Falls Barrow (Main Quest): Farengar Secret-Fire’s request for the Dragonstone. This is part of the “Dragon Rising” quest chain and is mandatory for main story progression. Completing it unlocks the dragon encounter at the Western Watchtower, which is Skyrim’s first major setpiece.
Before the Storm (Main Quest prerequisite): You need to complete “Before the Storm” (talking to Jarl Balgruuf in Whiterun) before Farengar gives you the Dragonstone quest. If you’re rushing Bleak Falls early, you can grab the Dragonstone in advance, then turn it in immediately when Farengar requests it.
Word of Power: Force (Radiant): While not a formal quest, learning Fus at the Word Wall is tracked in your shout progression. You’ll receive radiant quests later (from Arngeir or the Greybeards) to find additional Word Walls, but Bleak Falls is always your first.
Connections to other locations: The bandits outside Bleak Falls sometimes carry notes or bounties referencing Dawnstar or other hold capitals, tying into the broader bandit faction system. Also, the architectural style and puzzle mechanics in Bleak Falls set the template for dozens of Nordic ruins across Skyrim.
Completing Bleak Falls also opens up related dungeons with similar puzzle structures, such as Shroud Hearth Barrow (near Ivarstead) and Korvanjund (Stormcloaks/Imperial questline).
Conclusion
Bleak Falls Barrow is more than a tutorial dungeon, it’s Skyrim’s statement of intent. Every mechanic, puzzle, and combat encounter here reappears in more complex forms throughout the game. Master the rhythm of Draugr combat, internalize the pillar and claw puzzle patterns, and understand how Word Walls function, and you’ll breeze through the 100+ hours of content ahead.
The Golden Claw and Dragonstone are your immediate rewards, but the real prize is the muscle memory. You’ve learned to read environmental cues, manage resources during extended delves, and adapt your tactics to different enemy types. These skills carry over into every ruin, fort, and cave you’ll explore.
Whether you’re chasing the main quest, hunting skill books, or just exploring for loot, Bleak Falls Barrow delivers. It’s short enough to respect your time but dense enough to feel like a proper adventure. And now that you’ve cleared it, the Western Watchtower awaits, along with your first real dragon fight.
Good hunting, Dragonborn.